- Home
- C++ with Qt Tutorial
- Software installation (Win 8)
Step 3: Download Microsoft Visual Studio 2013 Express for Windows 8 / 8.1
If you are using a PC or notebook with Microsofts Windows 8.x (8.0 or 8.1) operating system, Microsoft's own Visual Studio development software is the default option for a fitting development environment (and one of the best).
Among the different Visual Studio products Microsofts Visual C++ (MSVC) is the product of choice for programming in the C++ programming language. The current version 5.3 of the Qt library supports the 2013 version of Visual Studio C++.
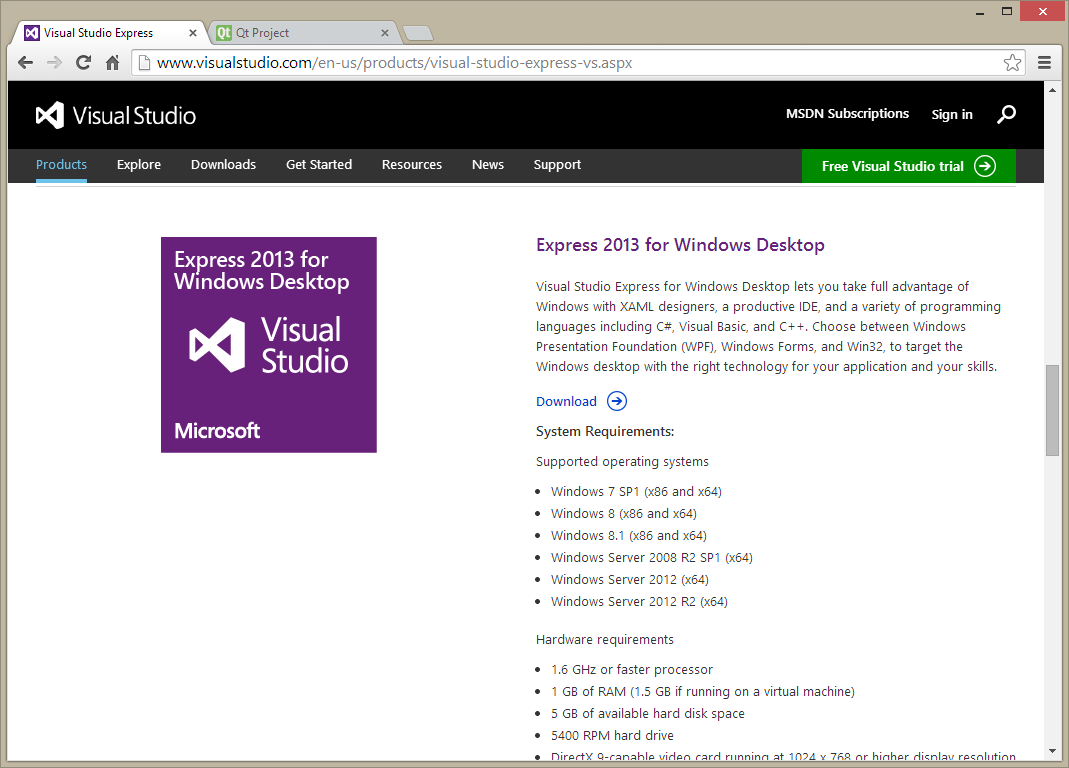
In contrast to earlier versions of Visual Studio, the software now includes tools for all supported programming languages for a selected platform. So instead of looking for Visual Studio C++, you just need to get Visual Studio 2013 for Windows Desktop. For this tutorial, we only need the "Express" Version which can be downloaded free of charge.
While Microsoft aims its Visual Studio software at professional software developers, they thankfully also supply the slightly trimmed-down "Express" versions of their Visual Studio development tools on the Visual Studio Express website as a cost-free download:

For this tutorial, we need the Visual Studio Express version for Windows Desktop. This can be found a by scrolling down the page a little:
Clicking on the download link for "Express 2013 for Windows Desktop" opens up a new page where you can select different language versions of the software and choose between an online installer and an ISO disk image for offline installation:
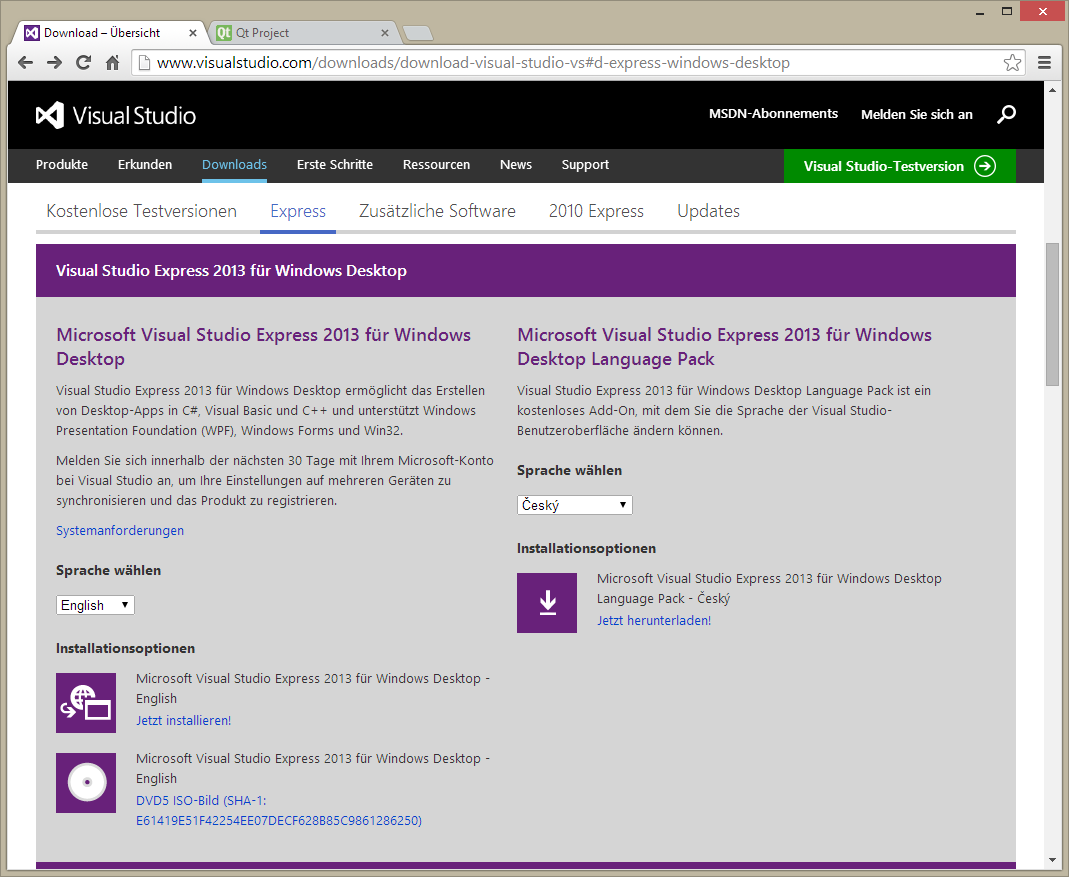
This web page automatically recognizes your system's current default language and displays description texts in the according language, as you can see from the screenshot above, where the texts are in German (because this is my current default language for Windows).
Here, you can select one of several available languages. This only affects the texts for the menus, options etc. in the Visual C++ development environment user interface. The C++ programming language is not affected by this (it always uses English keywords). You can also download additional language packs by using the download links on the right side of the page.
Once you have selected your language of choice, you can click on the "Install now" link, which is the first link and button in the "installation options" section. This will start the download of a small installation program named "wdexpress_full.exe".
This installation program can then be used to start the download and installation of Visual Studio Express 2013 for Windows Desktop.
Alternatively, you can choose to download the DVD image with the installation software using the second link. If you do that, you need to burn the downloaded image to a DVD or mount the image as a virtual disk in order to start the installation program.
Currently, clicking on the download link will open up a series of dialog screens before the actual installer is downloaded. You need to create a developer account in order to use the 2013 version of Visual Studio Express, or at least register your Microsoft account (Live account) as a development account. This allows you not only to receive related news and updates, but also to use the software to create applications for the official Windows Store.
First, you need to create or register your developer account:
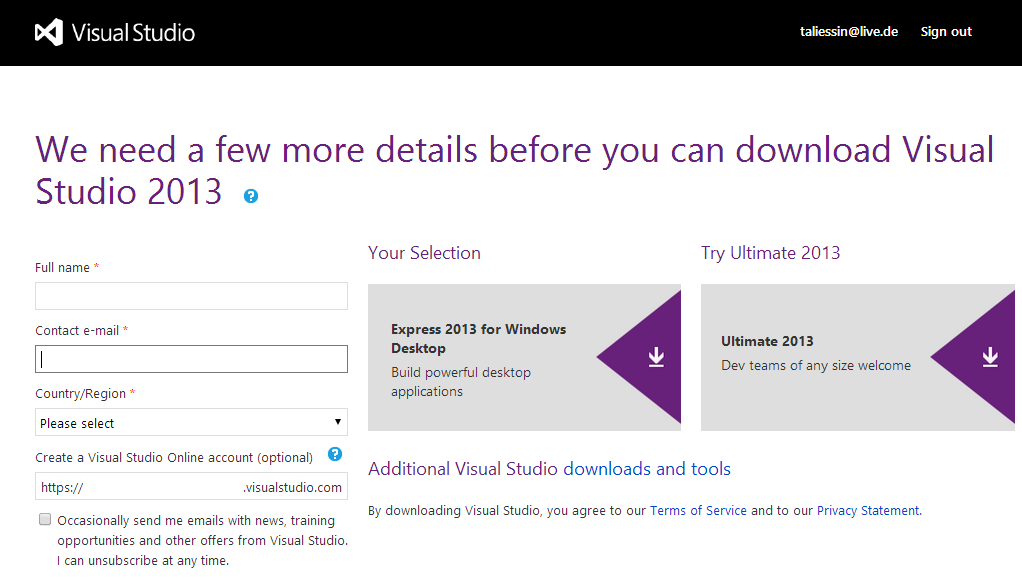
Your e-mail address from the Live account which you use to log in to your Windows desktop will usually appear in the contact e-mail field automatically. You only need to enter your name and your country or region here. While you can also create a Visual Studio Online account - which is needed for official Windows App Store development - we do not need this for this tutorial.
After entering all needed information into the marked fields, you can continue with the download process:
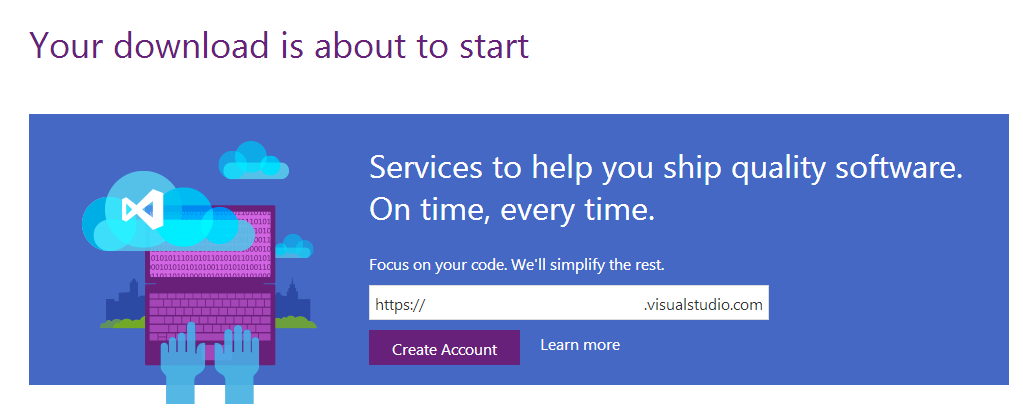
The download of the online installer or the disk image should start now. If you haven't already done this, you are offered the option to create a Visual Studio Online account for the Windows App Store development. As before, this can be skipped as it isn't necessary right now.
Step 4: Installation of the C++ development tools
After having downloaded the basic C++ development tools in the previous step the next step is to install the tools on your system, unless the download automatically started an installation.
Now, let's start with the software installation process.
While I have documented the installation process for the online installer below, the process and the dialogs will be the same if you use the installation program from the disk image instead. On the disk, there should be a program named "wdexpress_full.exe" or "install.exe" which you need to start in order to install the software.
Installation of Visual Studio 2013 Express for Windows Desktop
If you used one of the "install now" download link from the Microsoft Visual Studio Express website as described above, there should now be a small online installation program (usually "wdexpress_full.exe") in your download folder.
This installation requires an active internet connection. It connects to Microsoft's download servers and downloads and installs all components for Visual Studio 2013 Express for Windows Desktop, including all necessary system extensions and tools for C++ programming. Just start the web install program which you previously downloaded. This will present all further steps within on-screen dialogs:

Just use the default setup path here. You have to agree to the license terms and privacy policy for the software by clicking on the check box in front of the agreement statement (like in the screenshot above).
You can agree to join the improvement program for Visual Studio by also checking off the second option (which is active by default), or you can deactivate this by clicking on the related box in order to un-check it.
After clicking on the button labeled "Install" - and allowing the program to be installed in the standard Windows security dialog - the download and installation of Visual Studio Express 2013 for Windows Desktop will finally start:

Depending on the speed of your online connection (or the speed of your disk drive if you use the disk image), it might take some time for each of the components to be downloaded and installed.

Just be patient and wait for the process to finish. After all components have been downloaded and installed on your computer, the final dialog screen should look like this:

With a successful setup, you can now start Visual Studio Express 2013 for Windows Desktop by clicking on "Launch". At the first startup, you will likely be presented with some additional infos and dialogs, where you can connect the installation with your development- and Visual Studio Online accounts.
After these initial steps, the Visual Studio Express software can be closed.
For the rest of this tutorial, we will use the Qt Creator IDE instead of the Visual Studio IDE.
Step 5: Download the Qt library and tools
After having set up the basic C++ development tools for your system in the previous step, it is now time to install the additional Qt development libraries and tools. These will provide an additional framework which makes the development of modern desktop applications much easier than if we were using C++ alone.

The main Qt website can be found under http://qt.digia.com/ since Qt has been acquired by digia. While you can currently download an evaluation version there, for this tutorial and further open source development you should instead turn to the Qt developer network homepage - the open source version can be used free of charge:

The current version of Qt is 5.3 (at the beginning of July 2014). This version to offers full support for mobile platforms.
I will use Qt 5.3.x for the upcoming parts of this tutorial, occasionally updating the tools by either downloading new versions or using the integrated maintenance function.
Unless Qt is updated to version 6 (which may contain bigger changes), it is usually no great problem to install smaller updates. For this tutorial, the small changes represent no problem.
On the download page you can find links for separate downloads of individual components of the Qt SDK. We do not need these at the moment as the SDK download contains all necessary tools. Just select the offline or online installer for the operating system you are using.
There we can download the Qt SDK (software development kit) for Windows, Linux and MacOS by using the links on the download page http://qt-project.org/downloads. The web page for the software download will try to determine your current operating system and offer you a link for the optimal version of Qt:

The default option here is the download of the Qt online installer for your operating system, which will download and install all tools and libraries without their related source code.
Alternatively, you can download an offline installation package and choose to also download the source files. In this case, the name of the installation software reflects the Windows version and C++ development environment it is targeted at. For example, the offline installation program for Visual Studio 2012 for 64-bit Windows versions is named "qt-opensource-windows-x86-msvc2012_opengl-5.3.0.exe".
In any case you need to choose the right version of Qt for the C++ development software you already downloaded and installed - in our case, the version for Visual Studio (Express) 2013.
Step 6: Installation of the Qt library and tools
Independent of the installer version you chose, each Qt installer will bring up a series of dialog windows after you start the program.
In Qt 5, all necessary development tools (the Qt library, Qt Creator, Qt Linguist and other software) are already included in the standard installation option, so you can accept the default installation options. If you like, you can chose to install the Qt source code, but it is not necessary for this tutorial.
Simply accept the default settings and the Qt library and tools will be installed automatically.
Next steps
After the C++ and Qt development tools have been downloaded and installed, you can continue to step number seven for a short test that will confirm if everything has been installed correctly.
Alternatively, if you want to install C++ and Qt on additional computers with different operating systems, you can continue to the next page.
- Home
- C++ with Qt Tutorial
- Software installation (Win 8)