- Home
- C++ with Qt Tutorial
- Software installation (Linux)
Step 3: Download the C++ development tools
For PCs (or virtual machines) running a version of the Linux operating system the GNU C compiler tools (GCC tools) are the default option for writing programs in the C or C++ programming language.
Linux was build with the GCC tools. All the different Linux distributions available so far offer one or more ways to get and install the GCC development tools as part of the Linux system software.
I cannot give instructions for all the different Linux distributions here - there are just too many. There are also several different software installation tools available for Linux systems, which offer the same basic software packages and some special additional software, with a different look and feel.
Different ways for Linux software installation
If you are familiar with the installation of software for your Linux distribution of choice, you already know that there are different ways to install software packages under Linux. If you just installed Linux and have only used the software that was installed as part of the initial installation however, here are the basic options for installing new software:
- use the default software or package manager software that is part of your Linux distribution to select and install additional packages
- use the "apt-get" command line tool to download and install new software packages
- manually download Linux installation packages or installer programs from a website and install them using the command line tools
Independent of the way you use to install software, you always need the superuser / root password in order to install something new. If you installed and configured the Linux distribution yourself, you should know the root password as you defined that as part of the installation process. If somebody else installed the system software, you have to get the superuser password from this person.
Apart from the password, you also need an internet connection - unless the installation disks of your Linux distribution come with a complete selection of software packages including the ones you want to add (which may not be part of the default installation).
Using the software or package manager software of your Linux distribution is usually the easiest way to install new software. In current distributions, these programs look and handle similar to the app store programs for MacOS or Windows, with clearly structured graphical interfaces. They usually have a search function, and you can browse a catalog of different applications by navigating the different application categories etc.
In contrast to this, the command line tool "apt-get" is relatively basic. You just have to know the name of the software package you want to download and install, then you can run "apt-get" for the related package(s) using superuser rights. Just like the more user-friendly software and package managers with graphical front-ends however, "apt-get" checks for dependencies between packages. So if the package you are trying to install needs any additional packages in order to function properly, these additional packages will also be downloaded and installed.
The manual download and command-line installation of Linux software packages can be a little more difficult than using "apt-get". While the download itself is easy enough - just open the download page in your web browser and click on the right link - the installation often needs changing the owner and executable status of the downloaded files before you can start with the actual installation process.
Download GCC for Linux
Under the Linux operating system, you can use the standard GCC development tools package for C++ programming, which usually includes C++ compiler and related libraries and tools.
The GCC installation package is included in all current Linux distributions. When you install Linux on your computer, the GCC development tools package can be selected during the package selection phase of the installation. Some distributions automatically install this package if you use the default installation, while others only offer this package as an optional install.
If you are not sure that the "gcc" package has been installed with your version of Linux, you can check that in your software or package manager application. As an alternative, you can try to enter "gcc" in the command line inside a terminal window. If you don't get any message from gcc or gcc is not found, you should install it.
If you select the GCC package in the Linux installation or in the package manager tool, the package will usually be downloaded and installed in the same go, so you can continue with the testing of the new installation. Your Linux installation disk should contain the gcc packages, so you may not have to go online in order to get and install them. There should be some kind of documentation for your Linux distribution - online or offline - where you should be able to get more details on how and where to get the GCC package.
Step 4: Installation of the C++ development tools
Depending on the way you use to get the "gcc" package with the basic C++ development tools (see above), the installation process can take on different forms.
As an example of how this can look like, I am using Linux Mint which I recently installed on an old notebook computer. This is version 17 (codename "Qiana"), with the "Mate" Desktop (which does not need a modern graphics chip with integrated 3D accelleration like the "Cinnamon" version), in the 32-bit version.
GCC Installation with the Linux Mint Software Manager
Under Linux Mint, the software manager is the main tool for the installation and deinstallation of software packages. The link to the software manager application is included on the default "Welcome Screen" for Linux Mint:
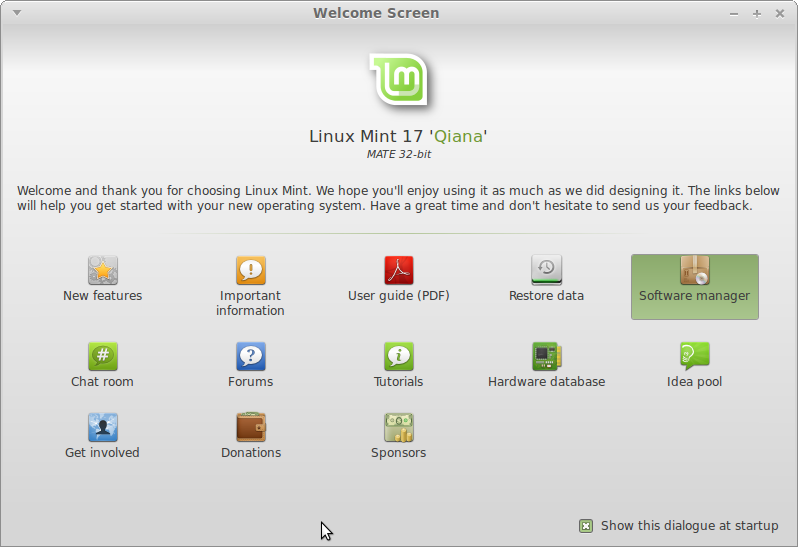
You can also find the software manager in the Linux Mint application menu, as part of the administrative tools.
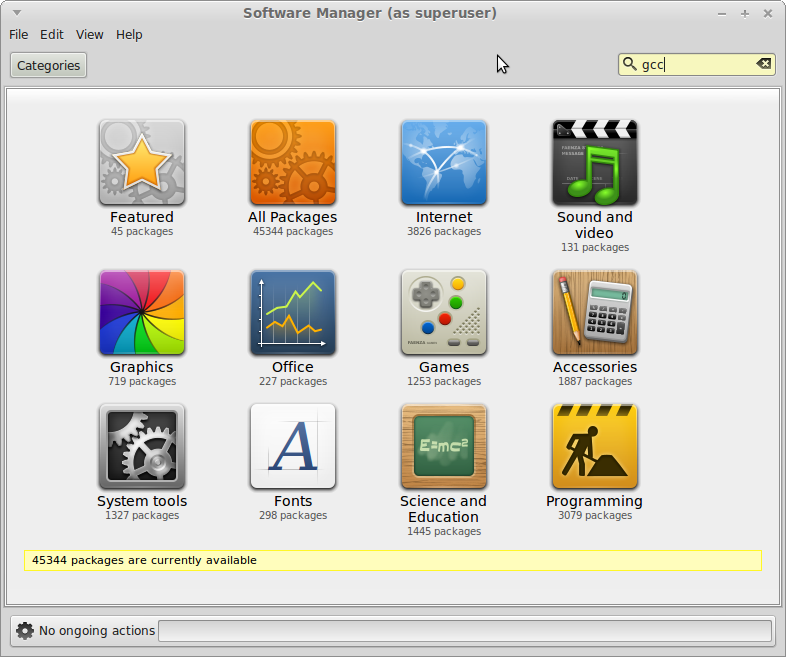
When the software manager is started, you are automatically prompted for the super user password. Without that, you cannot install any new software.
Inside the software manager, you first get a window with some link-icons that lead you to the different software categories:
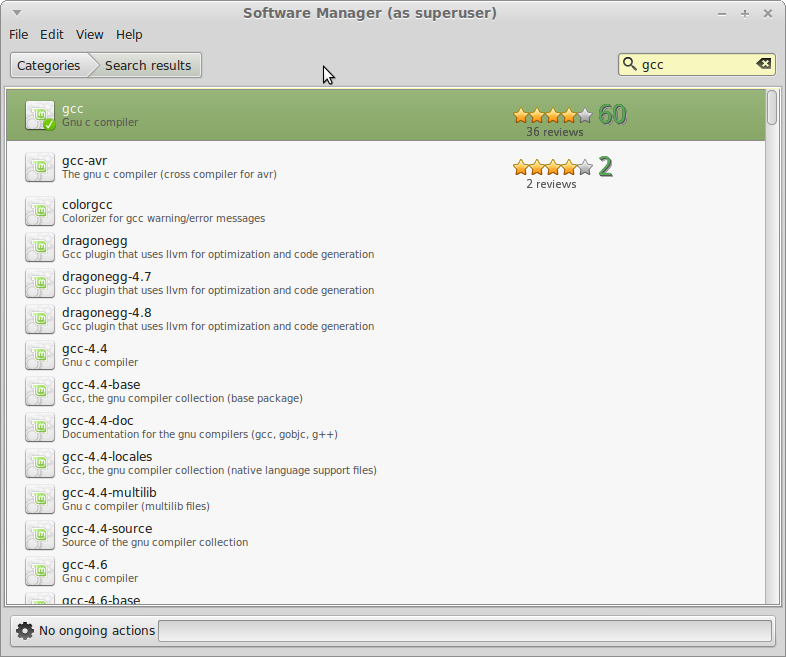
As we need the GCC package(s), you can simply enter "gcc" into the search box in the top right corner of the window. After hitting the enter key, this should give you a list of related packages like this one:
By clicking on a list item you can get additional information about the individual software package:
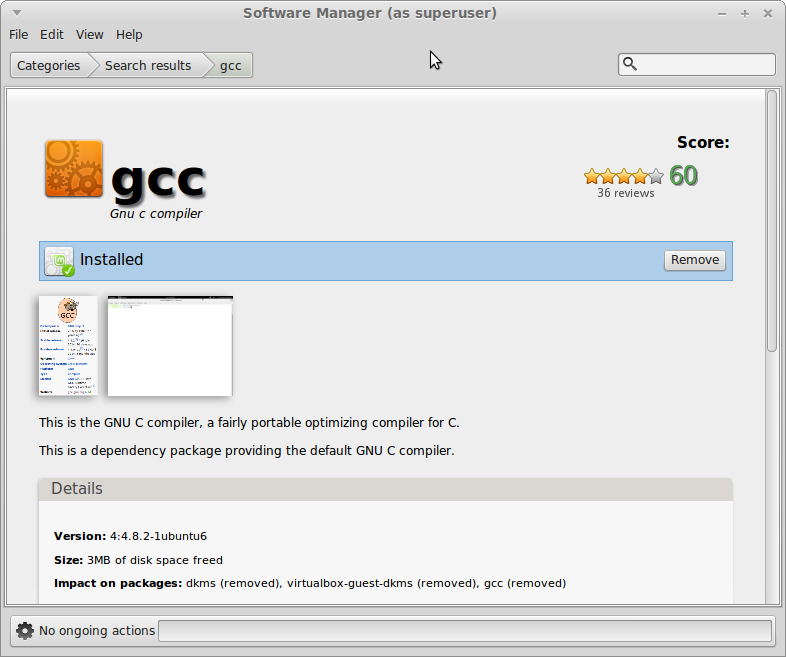
In my case, the "gcc" package (and related packages that it depends on) has already be installed as part of the default Linux Mint installation. If it had not been installed, I just would have needed to click on the "Install" button in the upper right, which is replaced by the "Remove" button after a successful installation.
The "Install" button (if available) automatically starts the download of the package from the Linux Mint servers and installs the whole package as well as dependency packages once the download has been finished.
GCC Installation with "apt-get"
Using the "apt-get" command line tool for software installation is relatively easy and fast, as long as you know the name of the package that you want to install.
In order to install the "gcc" package with "apt-get", you need to do the following steps:
- Open a terminal window.
- Enter "su", hit the "return" key, and enter your superuser password in order to get the necessary rights for the installation of new software (alternatively you can use the "sudo" command in combination with "apt-get" and its additional parameters).
- Enter "apt-get install gcc" in order to download and install the gcc package and any dependency packages.
- Wait for the installation to finish - the command prompt should reappear when everything is finished.
Here is a screenshot of the "apt-get" installation of gcc from my Linux Mint system:
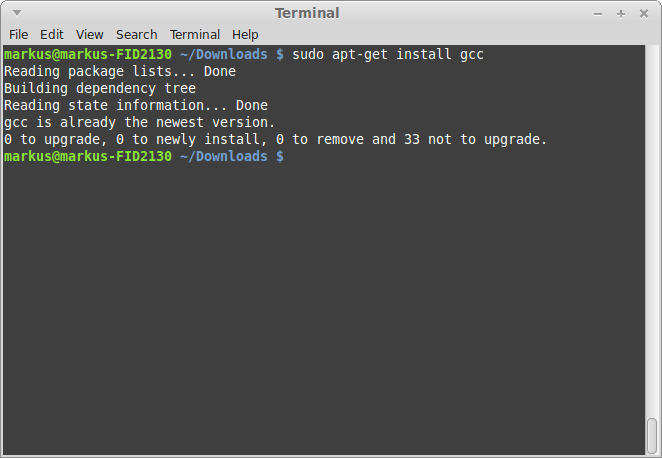
As you can see, the "apt-get" tool realizes that the "gcc" software package has already been installed, so it does not try to download and install the package a second time.
Step 5: Download the Qt library and tools
After having set up the basic C++ development tools for your system in the previous step, it is now time to install the additional Qt development libraries and tools. These will provide an additional framework which makes the development of modern desktop applications much easier than if we were using C++ alone.
Under Linux Mint (which I am using as an example here) there are three different options for the installation of the Qt libraries and tools:
- download and installation using the software manager
- download and installation using the "apt-get" command line tool
- manual download of the installation files from the qt-project.org website, followed by a manual installation
Qt SDK download and installation with the software manager
Just as with GCC, download and installation of the Qt development tools and libraries is quite easy if you use the Linux Mint software manager.
After starting the software manager, the packages we need can be found by searching the catalog for "qt":
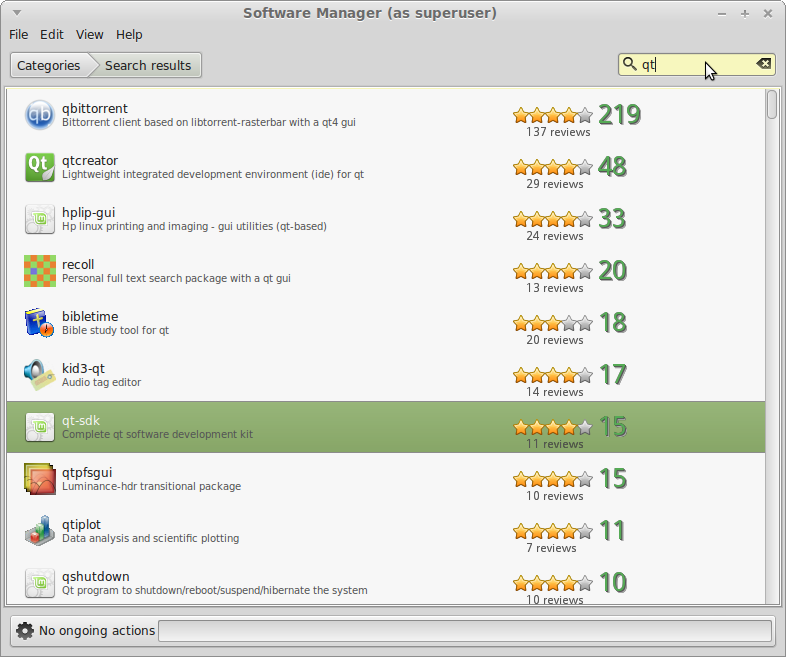
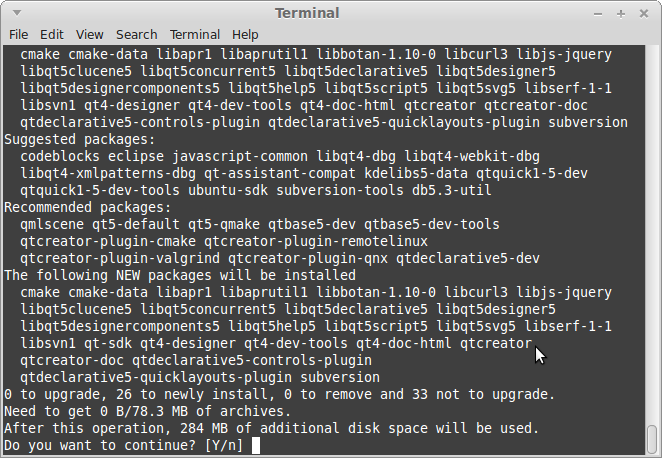
While "Qt Creator" is the central tool for any software development with Qt, we need the "qt-sdk" package. This is the complete Qt software development kit (SDK) with all the libraries, tools etc. (including Qt Creator).
Clicking on the "qt-sdk" list entry, you should see the package details and the "install" button:
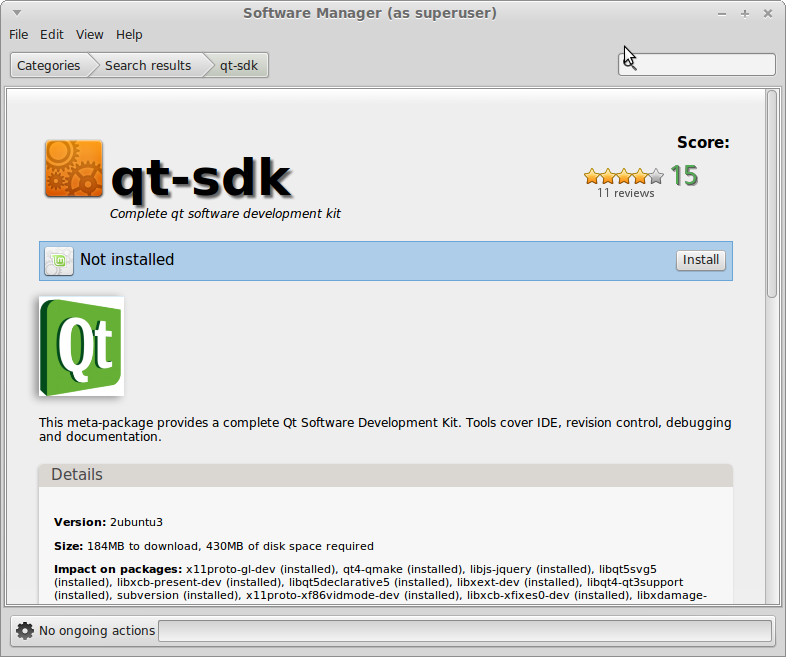
Clicking on the "Install" button should start the download and installation of the Qt SDK and all dependency pagages.
When the installation process is finished, links to the main tools of the Qt SDK should appear in the Linux Mint application menu. Looking under "All" applications and searching for "qt" should result in a list similar to this one:
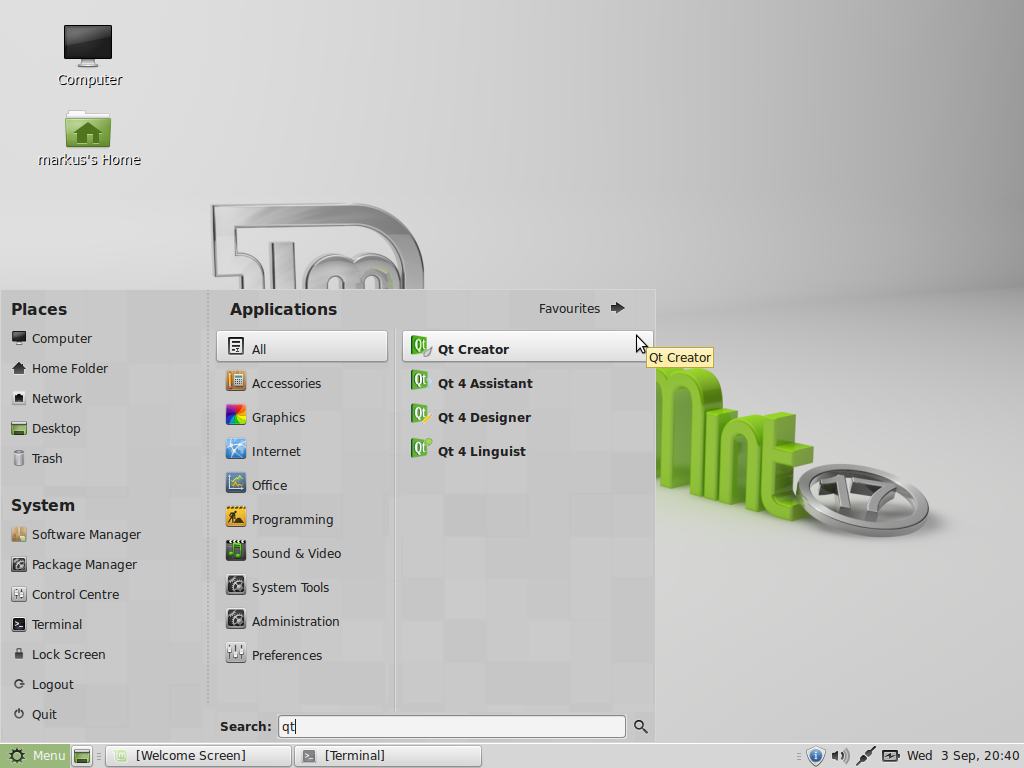
The Qt applications should also appear under the "Programming" group.
As you can see from the screenshot above, the installation of the Qt SDK through the Linux Mint software manager has a downside: you cannot be sure that the version of the Qt SDK that is available through the software manager (for your version of Linux Mint) is the most current version.
On the positive side though, this way of installing the software always gives you a software package that will definitely work on your current system - so there is no incompatible software.
Qt SDK download and installation with "apt-get"
In order to use "apt-get" to download and install the Qt software development kit package you need to perform similar steps as with the gcc package:
- Open a terminal window.
- Switch to the superuser account by entering "su", followed by the related password (or use "sudo" in combination with "apt-get".
- Enter "apt-get install qt-sdk".
- Wait for the packages to be downloaded and installed.
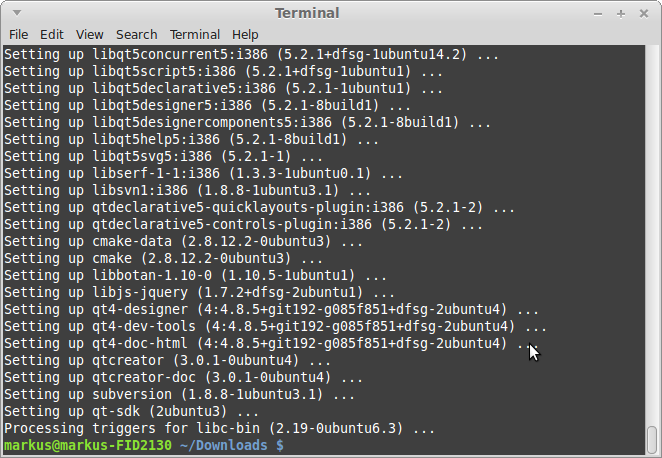
Here is what the process looks like on my Linux Mint system:

I am not sure if Linux Mint will add links to the Qt
applications in the application menu as it does with the software
manager installation, so you might have to add your own links to the menu (or
to the desktop or wherever you like) for fast access. In my case, the links were there, but they may have been left over from the previous Qt SDK installation with the software manager (although I removed the packages there before starting "apt-get").
Qt SDK manual download and installation
A manual download and installation of the Qt SDK will give you the newest versions of the Qt library and tools, but there is no guarantee that the precompiled version you can download from the Qt project website will run on your Linux installation without any problems.
There may be dependencies to other packages that you also have to download and install.

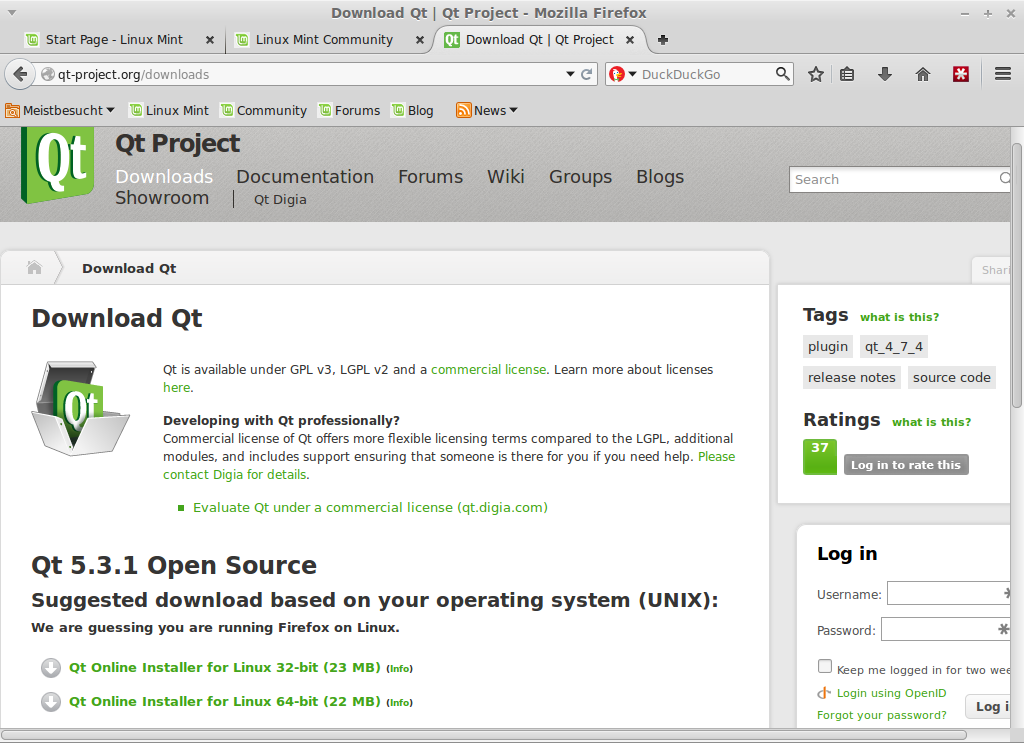
The main Qt website can be found under http://qt.digia.com/ since Qt has been acquired by digia. While you can currently download an evaluation version there, for this tutorial and further open source development you should instead turn to the Qt developer network homepage - the open source version can be used free of charge:

The current version of Qt is 5.3.1. This is the version to also supports development for mobile platforms (smartphones and tablets).
I will use Qt 5.3.x for the upcoming parts of this tutorial, occasionally updating the tools by either downloading new versions or using the integrated maintenance function.
Unless Qt is updated to version 6, it is usually no great problem to install smaller updates. For this tutorial, the small changes represent no problem.
On the download page you can find links for separate downloads of individual components of the Qt SDK. We do not need these at the moment as the SDK download contains all necessary tools. Just select the offline or online installer for the operating system you are using.
There we can download the Qt SDK (software development kit) for Windows, Linux and MacOS by using the links on the download page http://qt-project.org/downloads.

As you can see on the Qt download page, the basic choice for all available versions for the different operating systems is one between the online and the offline installers for each operating system.
In order to have the most flexible options for future software development, my personal recommendation is to download and install most of the available parts of the Qt SDK. Therefore I would advise you to choose the offline installer. This also avoids possible connection problems during the installation of the documentation.
The online installer option will start the download of a smaller program (named something like
"qt-opensource-linux-x86-1.6.0-4-online.run" in the case of the Linux version of the Qt SDK). Starting this program on your computer after it has been completely downloaded will bring you to the next step in the installation process, the selection of the Qt SDK parts for the final installation.
With the offline installer a larger file will be downloaded to your computer (for Windows this is named something like "QtSdk-offline-win-x86-v1_2_1.exe"). This file already contains all currently available parts of the Qt SDK, so an additional download is not necessary.
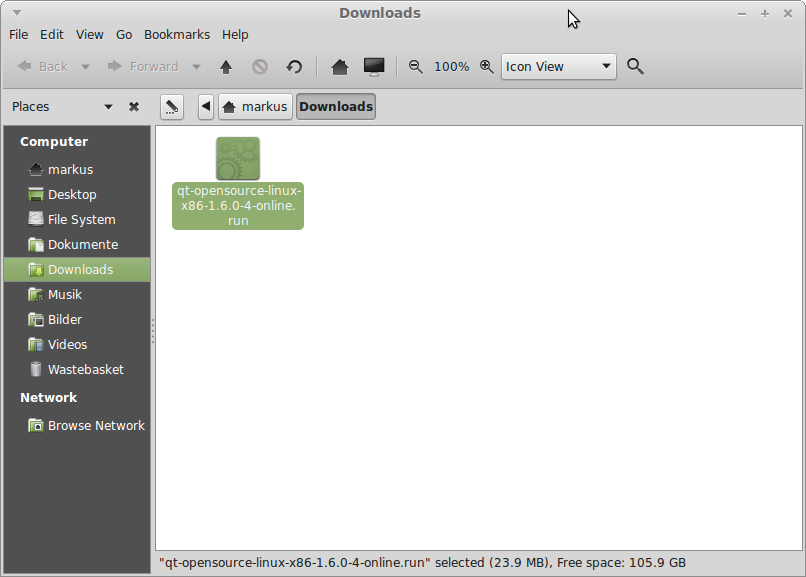
For Linux, clicking on the download links will start downloading a ".run" file to your download directory:
The online installer files are the default option. You can choose between a 32-bit and a 64-bit version. The offline installation files can be found further down the page once you open up the full list of available downloads.
Once the download is finished, you should see the installation file in your download directory:
Step 6: Installation of the Qt library and tools
If you used the Linux Mint software manager (or a similar software or package manager tool) or the "apt-get" command line tool in order to download the Qt SDK, the downloaded packages will automatically have been installed after the download.
So you only have to do this step if you chose a manual download from the "Qt Project" website.
Preparing the Qt SDK installation files
After downloading the Qt SDK installation file(s) from the "Qt-Project" website (see above), the files are not automatically recognized as executable files. So we have to change their status information and their owner first.
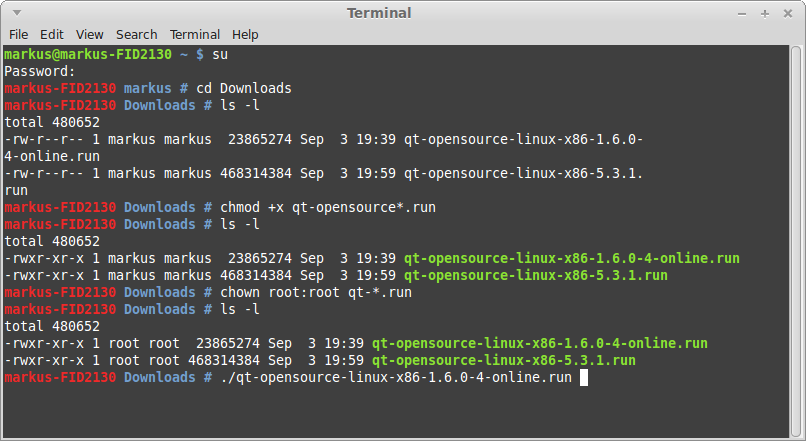
For this, we need to open a terminal window first. There, you can use the "cd" command (change directory) in order to go to the download directory that contain the installation file(s):
cd /Downloads
You can check the file name(s) and file status and owner information with the "ls" (list service) command:
ls -l
This should give you a list with the necessary information.
In order to turn the installation files into executable files, we can use the "chmod" (change mode) command:
chmod +x ./qt-opensource*.run
If you get an error message saying that your rights are not sufficient for this operation (or something similar), try "sudo" followed by the same command and parameters as before. This prompting you for the superuser password and executes the command with superuser privileges afterwards (if you entered the right password).
You can check the results of the mode change by listing the current status with "ls -l" and comparing it to the previous data.
After making the installation file(s) executable, you should also change the owner of the file by using the "chown" (change owner) command:
chown root:root ./qt-opensource*.run
As before, if you get a error due to missing rights, use "sudo" before the above command. Check the results with "ls -l".
Here is a screenshot showing the commands I used to prepare the manual installation on my Linux Mint system:
Once both changes have been made, the downloaded installation file can be used to start the installation process. Leave the terminal window open for the following steps.
Running the Qt SDK installation
In order to avoid any problems during the installation process, you should either switch to the superuser account by entering "su" in the terminal window, or use "sudo".
In both cases, you should now be able to run the Qt SDK installation file like any executable application. Simply enter the name of the ".run" file into the command line and hit enter, or enter "sudo" followed by the name of the ".run" file (and hitting the enter key).
If you followed the preparation steps listed above, you should be able to start the ".run" file that is the Qt SDK installation program. Entering the file name in the command line of the terminal window you used before or using a double click in the file browser should start the installer:
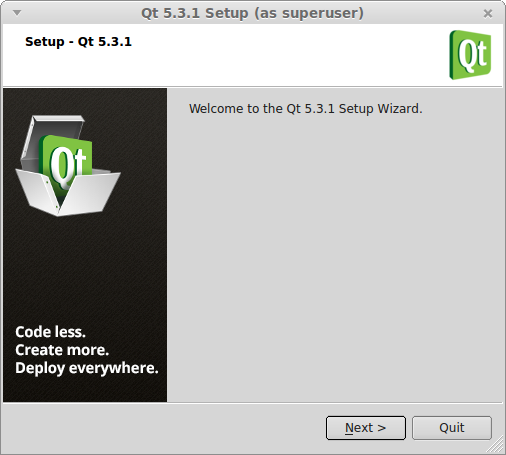
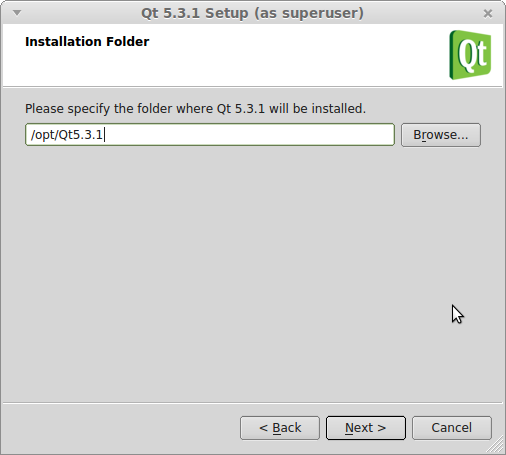
You need to start the installer with superuser rights (using "su" or "sudo"). If you do that, the installation process is similar to the Windows or MacOS installation of the Qt SDK. First, you need to select the directory where the SDK should be installed:
After choosing the target directory, you can select the components of the Qt SDK that you want to install:
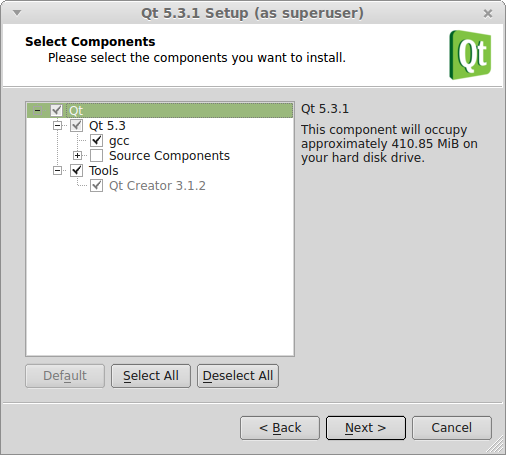
For this tutorial, the source components are not needed, so you can simply use the default options here. After the component selection, you need to approve the different license agreements:
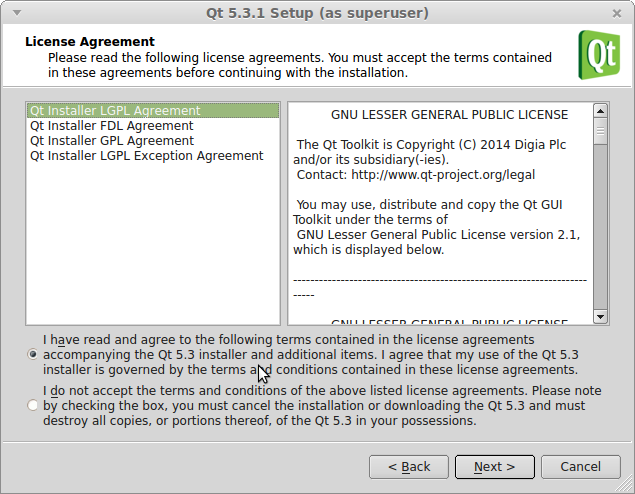
You need to click on the "I have read and agree..." option before you can continue to the next step in the installation process:
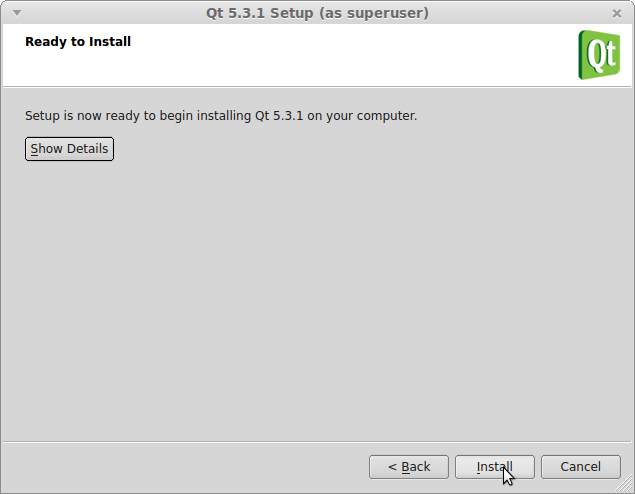
After checking the details (if necessary), click on the "Install" button in order to start the installation of the selected software components. If you use the online installer, this will download the components to your computer and install them afterwards.
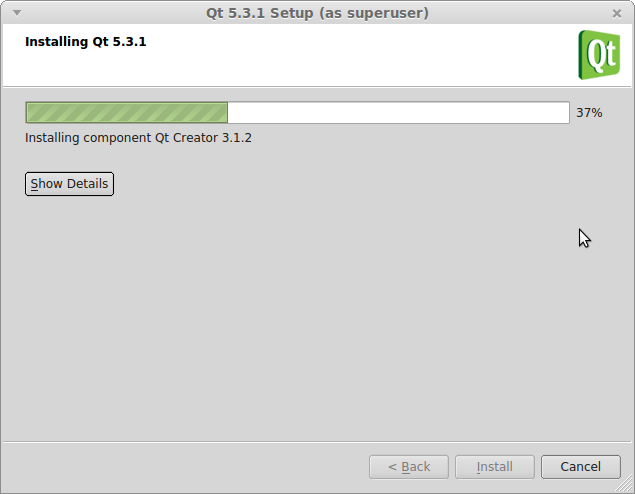
The progress bar will tell you the status if the software installation. When all selected components have been downloaded and installed, the installation program should show a finish screen like this one:

After the installation has been finished, the Linux Mint application menu should show an additional entry for "Qt Creator (opensource)" in the programming group (or if you search all applications for "qt").
Next steps
After the C++ and Qt development tools have been downloaded and installed, you can continue to step number seven for a short test that will confirm if everything has been installed correctly.
Alternatively, if you want to install C++ and Qt on additional computers with different operating systems, you can go back to the previous pages.
- Home
- C++ with Qt Tutorial
- Software installation (Linux)